How to Make a Durable Dog Collar Out of Rope for Hiking
As a dog owner and hiking enthusiast, ensuring your pet is both comfortable and safe during outdoor adventures is crucial. One essential item for any hiking dog is a durable collar that can withstand the wear and tear of rugged terrains. In this guide, we’ll walk you through how to make a dog collar out of rope for hiking using paracord—an ideal material for creating a strong, customizable, and stylish collar.
Whether you’re new to DIY projects or you’re a seasoned crafter, creating a custom dog collar can be a rewarding and cost-effective way to provide your pet with a collar tailored to their needs. Let’s dive into everything you’ll need to get started, followed by a step-by-step process on how to create your own hiking-ready dog collar.
Materials Needed for Your Custom Dog Collar
Before we begin, let’s go over the materials you will need to create your custom dog collar. Most of these items are simple and easy to find, but the key to success is choosing the right ones. Here’s a breakdown of what you’ll need:
Paracord: Paracord is a strong, versatile rope that is perfect for creating durable dog collars. You’ll need approximately one foot of paracord for every inch of your dog’s neck circumference. For example, if your dog’s neck measures 8 inches, you’ll need 8 feet of paracord. Paracord is ideal because it’s both lightweight and strong, making it perfect for hiking and outdoor activities. You can choose from a variety of colors and patterns to personalize the collar to your dog’s unique style.
Buckle: A side-release buckle is recommended for ease of use and secure fastening. It allows you to quickly and easily put on and remove the collar, and ensures that it stays in place during your hikes.
D-ring: This is essential for attaching a leash or your dog’s ID tags. The D-ring should be strong enough to handle the weight of your dog’s leash and tags without bending or breaking.
Scissors: You’ll need sharp scissors to cut the paracord to the desired length. Make sure they’re sturdy enough to handle thick paracord.
Lighter: A lighter will help you seal the ends of the paracord to prevent fraying. This step is crucial for ensuring the durability of your collar.
Measuring Tape: A measuring tape will help you accurately measure your dog’s neck size, ensuring that the collar fits comfortably.
Choosing the Right Paracord for Your Dog’s Collar
When selecting paracord for your project, it’s important to choose one that’s strong enough to withstand outdoor activities. Look for paracord with a tensile strength that suits your dog’s size and activity level. For a smaller dog, a paracord with a 550-pound tensile strength should be sufficient, but for larger or more active dogs, you may want to consider 750-pound or 1000-pound tensile strength paracord for added durability.
Paracord also comes in a variety of colors and patterns. You can opt for a solid color to keep it simple, or mix and match different colors for a fun, custom look. The great thing about paracord is its versatility, so you can get creative and make a collar that matches your dog’s personality and your own style.
Step 1: Measure Your Dog’s Neck for the Perfect Fit
The first and most important step in creating a dog collar out of rope is measuring your dog’s neck to ensure the collar fits perfectly. To do this, use a measuring tape and measure around the area of your dog’s neck where the collar will sit. For a more comfortable fit, add an extra inch to the total measurement to account for space between the collar and your dog’s skin.
Tip: Fit Check
When the collar is complete, be sure to check the fit. You should be able to fit two fingers comfortably between the collar and your dog’s neck, which will allow for movement without being too tight.
Step 2: Preparing the Paracord and Cutting It to Size
Once you have your measurements, it’s time to prepare the paracord.
Cut the Paracord: Using your measurements, cut the paracord to the required length. Remember that you’ll need about one foot of paracord per inch of neck circumference. For a neck measurement of 8 inches, cut approximately 8 feet of paracord.
Cut Multiple Colors: If you plan on using two colors for your collar, cut equal lengths of each color. For example, for a two-color design with an 8-inch neck, cut 4 feet of blue and 4 feet of patterned paracord.
Tip: Use Sharp Scissors
Paracord can be tough to cut, so ensure your scissors are sharp and capable of cutting through the thick material without fraying the ends.
Step 3: Attaching the Buckle and D-Ring
Now it’s time to assemble the basic structure of the collar. Start by attaching the buckle and D-ring to the paracord.
Fold the Paracord: Start by folding the paracord in half. The fold will create a loop that will go through the buckle.
Attach the Buckle: Push the folded end through one side of the side-release buckle. Pull both ends through the buckle, then pass the ends through the D-ring. This will allow you to attach the leash or tags to the collar once it’s complete.
Secure the Paracord: Tighten the paracord so that it’s securely in place on the buckle and D-ring. Make sure the buckle is facing the correct way for easy release.
Visual Example:

Step 4: Knotting the Paracord for the Collar
With the buckle and D-ring in place, it’s time to start knotting the paracord to form the body of the collar. This step is where you get creative, as you can use a variety of knotting techniques to achieve a secure and stylish collar.
Start Knotting: Take one strand of paracord and cross it over the two middle strands. Then, pull the left strand through the loop created by crossing over.
Continue the Knotting Process: Repeat this process, alternating colors if you’re using multiple colors of paracord. Keep tying knots until you reach your desired collar length.
For extra durability and a unique design, consider using a cobra knot or king cobra knot. These are popular choices for DIY dog collars because they are both strong and stylish.
Pro Tip: Be sure to pull the knots tight to ensure the collar is secure. Loose knots can cause the collar to unravel over time, so keep them as tight as possible.
Step 5: Final Adjustments and Sealing the Collar
Once you’ve finished knotting, it’s time to wrap things up and finalize your collar.
Trim the Excess Paracord: Use your scissors to cut off any excess paracord, leaving about 1 inch of extra length on each end.
Seal the Ends: Use a lighter to carefully melt the ends of the paracord. This prevents fraying and helps secure the knots. Once melted, press the ends against the collar to ensure they don’t come undone.
Check the Fit: Before you finish, make sure the collar fits properly around your dog’s neck. You should be able to slip two fingers between the collar and your dog’s neck comfortably.
Visual Example:

With your collar complete, your dog is ready for their next hiking adventure! Not only have you created a functional and durable collar, but you’ve also crafted a piece that reflects your personal style. Ready to make your own? Gather your materials and start crafting!
Next Steps:
- Consider customizing your collar further with colorful patterns or by adding tags to your dog’s collar.
- Check out this guide on dog collars for more ideas.
Step 6: Safety Note – How to Ensure Your Dog Collar Remains Secure
Your dog’s collar should always be a safe and reliable accessory, especially when hiking or engaging in outdoor activities. While paracord is a durable material, regular inspection of your dog’s collar is crucial. Worn-out paracord or loose knots can pose a safety risk for your pet. Here’s how you can maintain the collar’s integrity:
- Inspect Regularly: Check your dog’s collar frequently for any fraying, loose knots, or damage caused by pulling or rough play.
- Replace When Necessary: If the collar starts to show signs of wear, replace it to avoid any risk of breakage during outdoor activities.
- Clean the Collar: Dirt and debris can get trapped in the knots and fabric. Clean the paracord collar periodically with mild soap and water to keep it in good condition.
By taking these simple precautions, you can ensure that your custom dog collar will serve your pet well for many hiking adventures.
Visual Example:

Conclusion: Personalizing Your Dog’s Collar and Enjoying the Hike
Now that you’ve learned how to make a durable dog collar out of rope, it’s time to hit the trails with your furry friend. Not only have you crafted a functional collar that will withstand the challenges of hiking, but you’ve also added a personal touch by choosing colors and designs that suit both your dog’s personality and your own style.
Creating your own collar allows you to be creative while ensuring that your pet is safe and stylish during your outdoor excursions. Whether you prefer a single solid color or a combination of fun patterns, your dog’s collar will be as unique as their spirit.
So, grab your paracord, buckle, D-ring, and scissors, and start crafting a collar that will last for years to come. Whether you’re embarking on a short walk or a long hike, your dog will be ready with a collar that keeps them safe and looking great.
Ready to make your own custom dog collar?
Check out our top picks for paracord and other dog supplies to get started!
FAQs about Making a Dog Collar Out of Rope
Q1: What kind of paracord should I use for my dog collar?
For most dogs, 550 paracord will suffice. However, for larger or more active dogs, you might want to choose a 750-pound or 1000-pound tensile strength paracord for extra durability.
Q2: Can I wash the paracord dog collar?
Yes! You can wash your paracord dog collar with mild soap and water. Just be sure to let it dry completely before using it again.
Q3: How do I know if the collar fits my dog properly?
When the collar is on your dog, you should be able to fit two fingers comfortably between the collar and your dog’s neck. This ensures it’s not too tight or too loose.
Q4: How long does it take to make a dog collar out of rope?
The entire process can take around 1-2 hours, depending on your experience with knotting and how complex the design is. It’s a fun and rewarding project!
Q5: Can I use this technique for other pet accessories like leashes?
Absolutely! The same paracord knotting technique can be used to make durable dog leashes or even harnesses for your pet. Customize your pet’s gear to match and create a matching set!
Enhance Your Dog’s Gear with These Products
If you’re looking to complete your dog’s outdoor gear collection, consider investing in high-quality dog leashes and ID tags to ensure your pet’s safety on hikes. Here are some top-rated products we recommend:
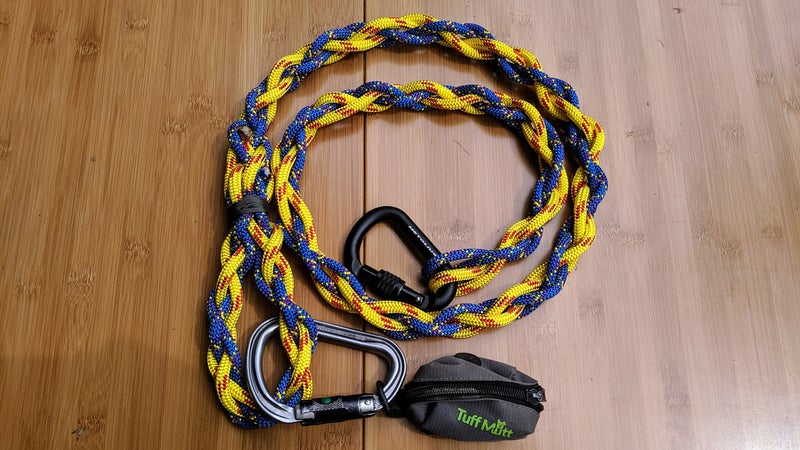
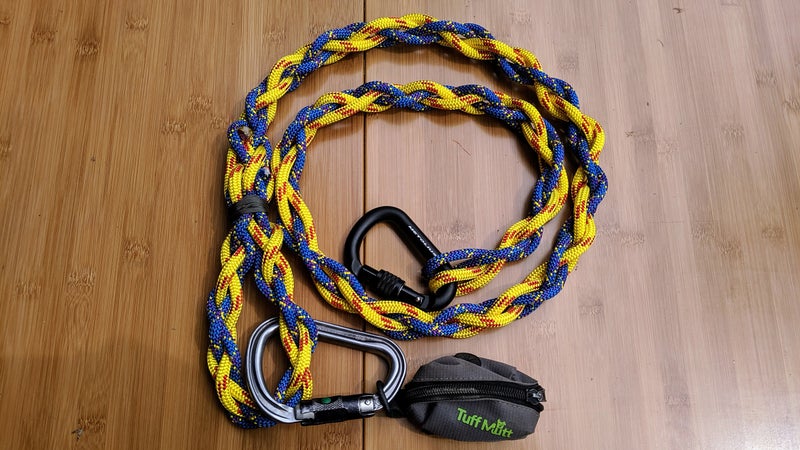
Durable Leashes for Hiking: Check out these rugged dog leashes made from paracord to match your new collar. They’re tough, lightweight, and perfect for outdoor adventures.
Personalized Dog ID Tags: Make sure your dog is always identifiable with stylish ID tags that can be attached to the collar. Custom tags ensure your dog stays safe no matter where you go.
Visual Example:

By following these steps and adding some creativity to your dog’s gear, you’ll ensure that your furry friend is both safe and stylish on every outdoor adventure. Plus, it’s a budget-friendly way to create a collar that’s as unique as your pet.
We hope this guide helps you create the perfect collar for your dog. Happy crafting and hiking!
Explore More:
If you love DIY projects and want to explore more ways to improve your pet’s life or outdoor adventures, check out our other pet product reviews and get the best dog hiking gear at MyTopDeals10.com.
https://cdn.outsideonline.com/wp-content/uploads/2019/06/26/dog-leash-8.jpg?width=800


