Handmade Dog Harness for Puppies: A Creative Guide
Creating a handmade dog harness for your puppy can be a fun and rewarding experience, allowing you to design something both comfortable and stylish for your furry friend. Not only will this project ensure the perfect fit, but it also offers the chance to add a personal touch that suits your puppy’s unique personality. In this guide, we’ll walk you through all the necessary steps, materials, and tips to make your very own dog harness from scratch.
Materials Needed for a Handmade Dog Harness
Before you start, you’ll need to gather a few essential materials to craft a functional and comfortable puppy dog harness. Here’s a list of what you’ll need:
1. Fabric
The fabric you choose plays a crucial role in your harness’s comfort and durability. Opt for strong yet soft fabrics like cotton, canvas, or webbing. Make sure the fabric is sturdy enough to hold the harness in place but soft enough not to irritate your puppy’s skin. If your puppy is particularly active or prone to pulling on walks, a webbing fabric is an excellent choice due to its durability.
- Tip: Choose a fabric that suits your puppy’s activity level. For example, a more durable fabric like canvas is perfect for active puppies, while soft cotton is ideal for puppies with sensitive skin.
2. Velcro or Buckles
The fasteners of the harness are essential for keeping it securely in place. You can choose either Velcro or buckles depending on your preference for ease of use and adjustability.
- Velcro is easy to use, especially for puppies that don’t mind a quick adjustment.
- Buckles, on the other hand, provide a more secure and adjustable fit, which is perfect if your puppy has a habit of pulling on walks.
3. Sewing Supplies
To bring your harness to life, you’ll need a few basic sewing supplies:
- Needle & Thread: Use a strong, durable thread that can withstand pulling.
- Scissors: To cut the fabric and trim excess threads.
- Pins: To hold your pattern and fabric in place while you sew.
- Sewing Machine: While hand-stitching is possible, a sewing machine will provide a much cleaner and stronger finish.
4. Measuring Tape
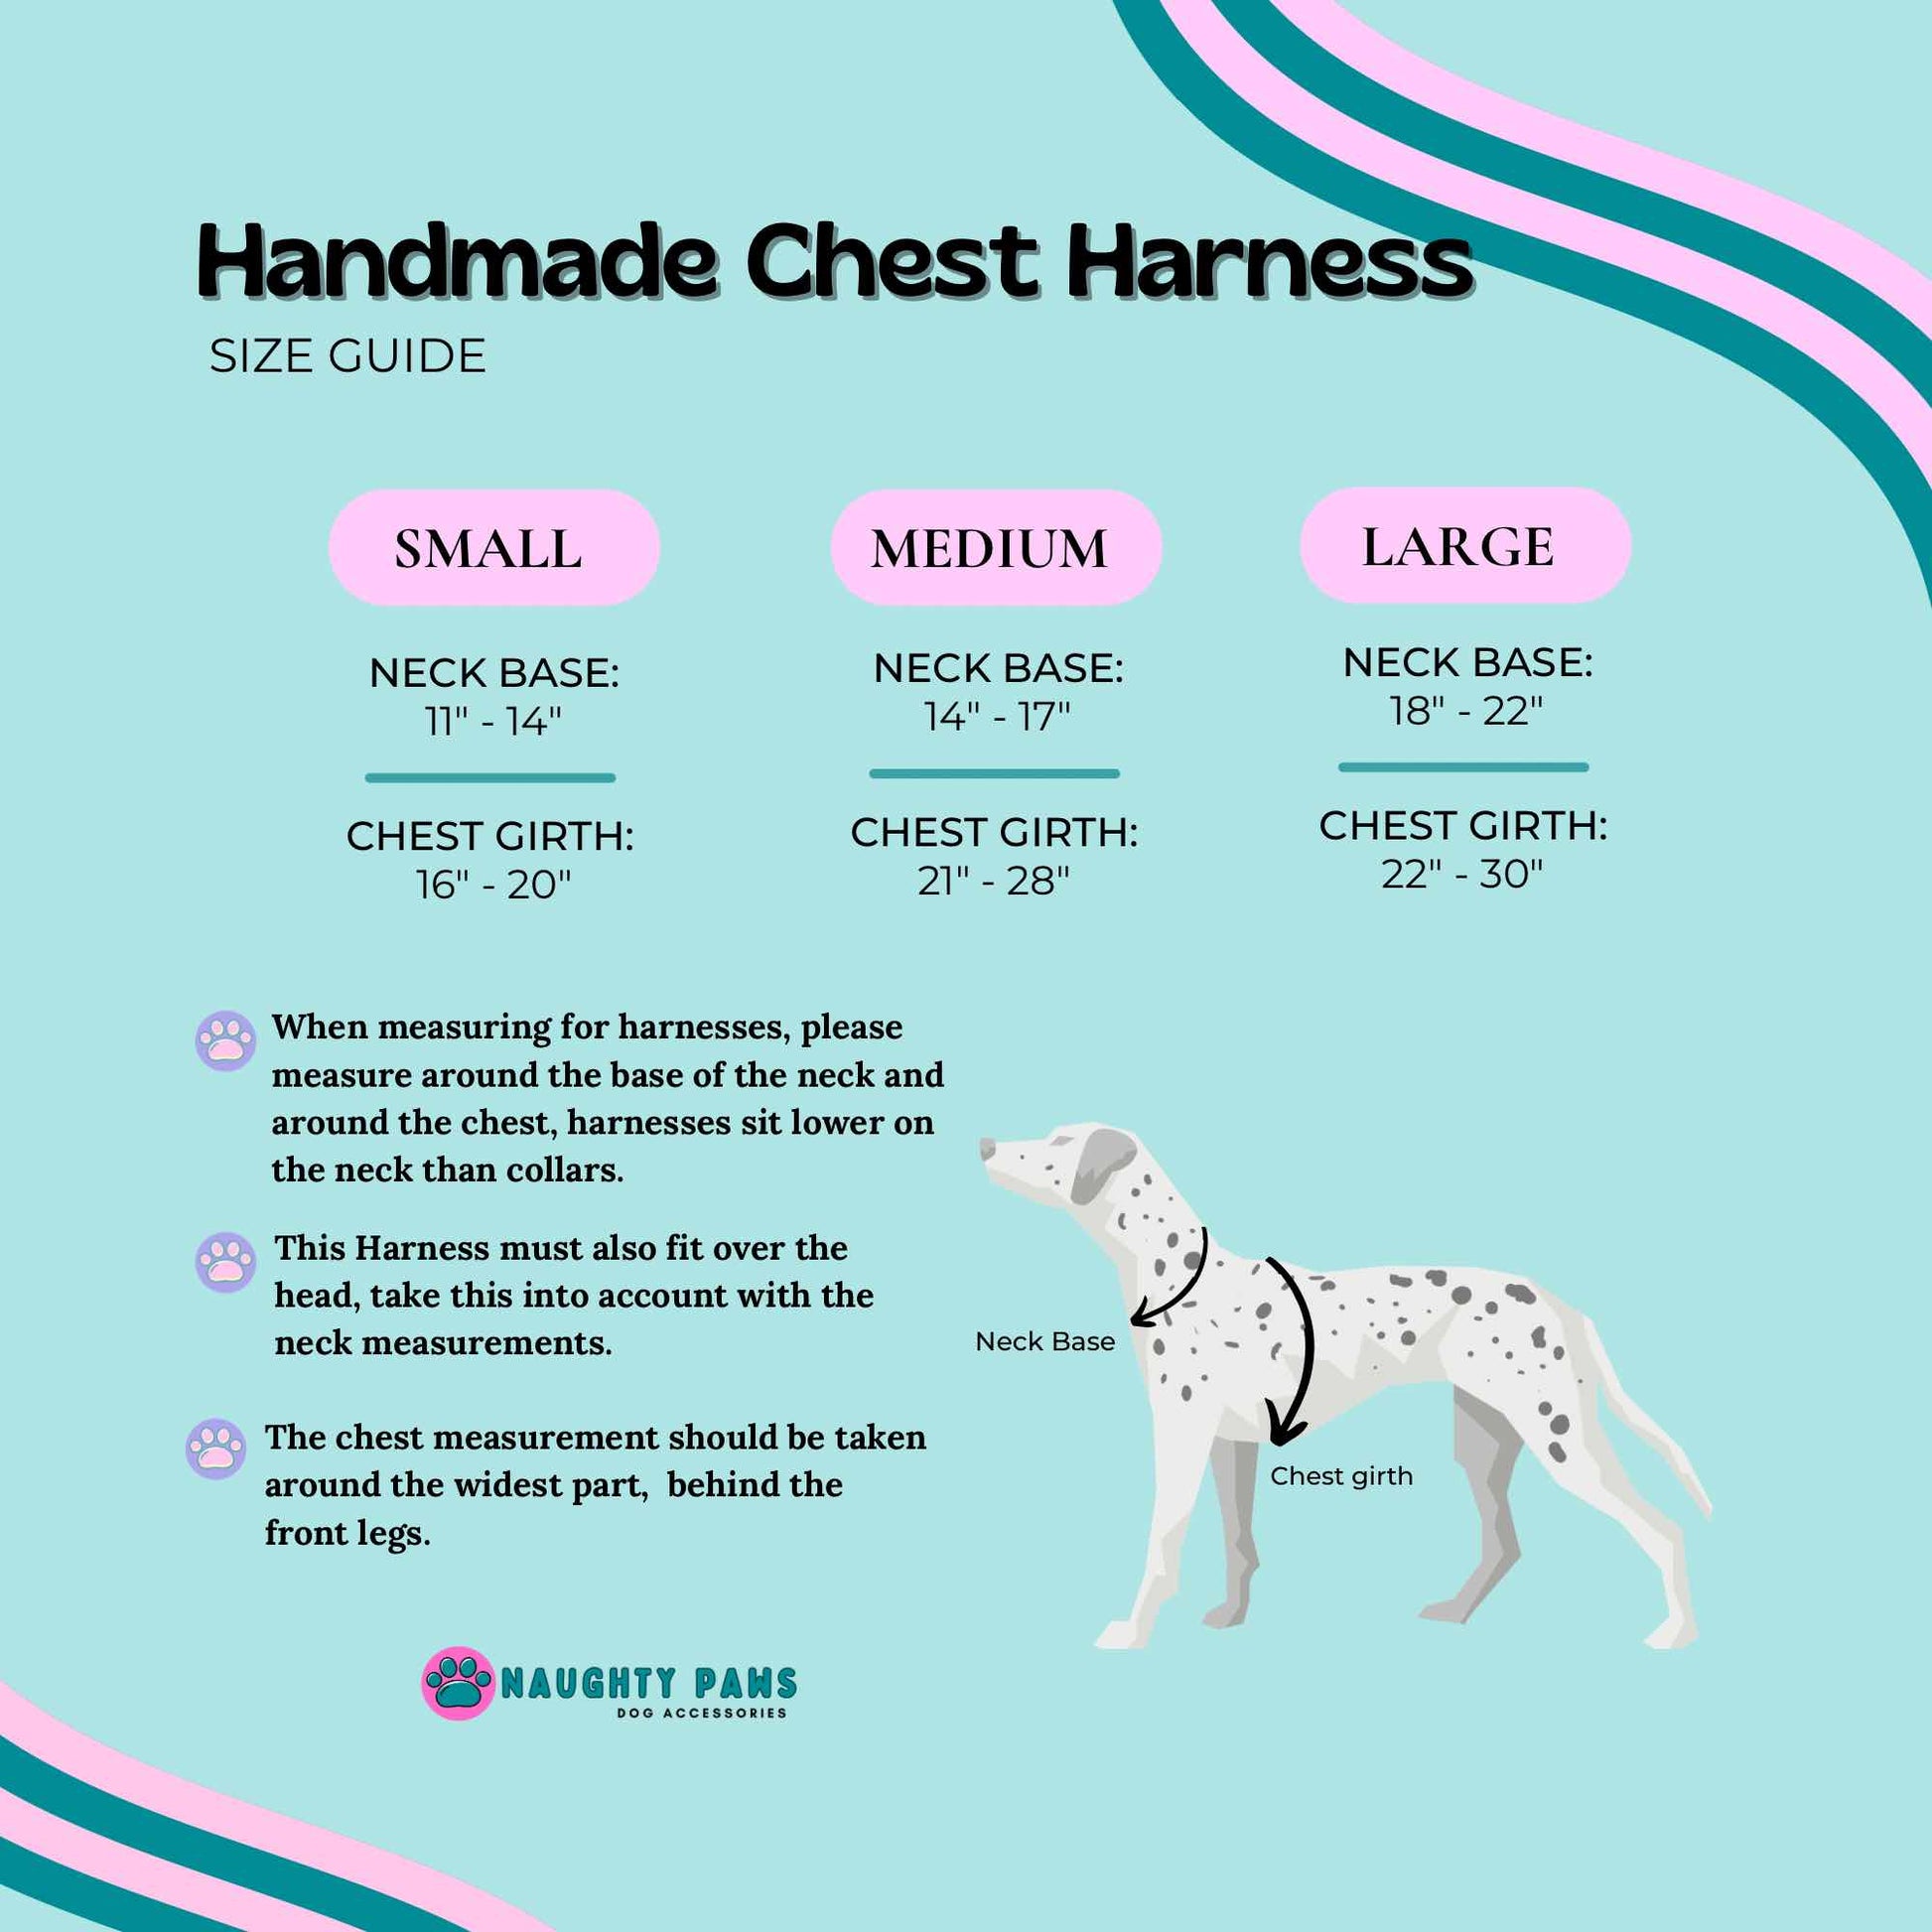
Accurate measurements are key to ensuring your dog harness fits properly. Be sure to measure both the girth (the widest part of your puppy’s chest) and the neck circumference. Adding a couple of inches to the girth measurement will help accommodate for growth and comfort.
5. Pattern
You can either create your own pattern based on your puppy’s measurements or download one from online resources like Let’s Make It Academy. There are several free printable patterns available that can simplify your crafting process.
Step-by-Step Guide to Making a Dog Harness
Now that you have all the materials, let’s break down the process into easy-to-follow steps to help you create a perfectly fitted handmade dog harness.
1. Measure Your Puppy
The first step in creating your custom dog harness is getting the measurements right. You’ll need to measure your puppy’s girth and neck circumference.
- Girth: This is the widest part of your puppy’s chest, just behind their front legs.
- Neck: Measure around the neck, ensuring the tape is snug but not tight.
Pro Tip: Add an extra 2 inches to the girth measurement to account for growth and to ensure the harness isn’t too tight.
2. Create or Download a Pattern
Once you have your puppy’s measurements, you can either create your own pattern or download a ready-made one. If you decide to create your own, sketch out the design based on your measurements, ensuring that the neck and girth sections are proportional. If you’d rather skip this step, many online resources like Let’s Make It Academy offer free printable dog harness patterns. These can be a huge time-saver and will ensure that your measurements are accurate.
3. Cut the Fabric
With your pattern in hand, it’s time to cut the fabric. Lay your fabric flat and pin the pattern to it. Be sure to leave a small margin around the edges for seams.
- Tip: Double-check the fabric’s orientation, especially if you’re using a fabric with a directional print or pattern.
- Important: Don’t forget to cut extra fabric for the seam allowances to ensure everything fits properly.
Sewing the Harness: Step-by-Step
Now comes the fun part—sewing! Follow these steps to assemble your puppy harness.
4. Sew the Main Body of the Harness
Start by sewing the main body of the harness together. This will form the part that sits across your puppy’s chest and back. Be sure to leave a small opening that will allow you to turn the harness inside out after sewing.
- Tip: Use a straight stitch for the body of the harness. Make sure your stitch length is even for a neat finish.
5. Create the Leg Holes
Using your pattern, cut out sections for the leg holes. These should fit comfortably around your puppy’s front legs without restricting movement.
- Pro Tip: Make sure the leg holes are large enough to allow your puppy to move freely, but not too big that the harness slips off.
6. Attach the Fasteners
Now, it’s time to attach the Velcro or buckles to the harness. This is the point where you can adjust the tightness and make sure everything is secure.
- If using Velcro, attach it to the side flaps of the harness, ensuring that the pieces line up so the harness stays securely fastened.
- If using buckles, ensure they are sturdy and placed at the right spots to avoid discomfort or chafing.

7. Turn the Harness Right Side Out
After sewing all the seams, turn the harness right side out through the opening you left earlier. Use a pencil or blunt object to gently push the corners out for a clean finish.
- Tip: Press the harness flat with an iron to ensure all seams are smooth and even.
Testing the Fit of Your Handmade Dog Harness
Once the harness is assembled, it’s important to test it on your puppy to ensure it fits comfortably and securely. Here’s how to do it:
Check the Fit
- Place the harness on your puppy and make sure it fits snugly around their chest and neck.
- Adjust the straps or Velcro as needed to ensure it’s not too tight or too loose.
- Make sure there’s enough room to fit two fingers between the harness and your puppy’s skin for comfort.
Safety First
Safety is paramount, so always double-check that your puppy isn’t able to escape or slip out of the harness. If you notice any areas that could potentially rub or irritate their skin, adjust accordingly.
In the next part of this guide, we’ll go over how to personalize your handmade dog harness and share additional tips for success to ensure you create the best fit and design for your puppy. Stay tuned!
Handmade Dog Harness for Puppies: A Creative Guide (Part 2)
Creating a handmade dog harness for puppies is not only an enjoyable project but also a way to make sure your puppy stays comfortable and stylish during walks. In the first part of this guide, we covered the essential materials and the basic steps to create a perfectly fitted harness. Now, we’ll dive into how to personalize your harness, offer some valuable tips for success, and answer your most frequently asked questions about making a dog harness.
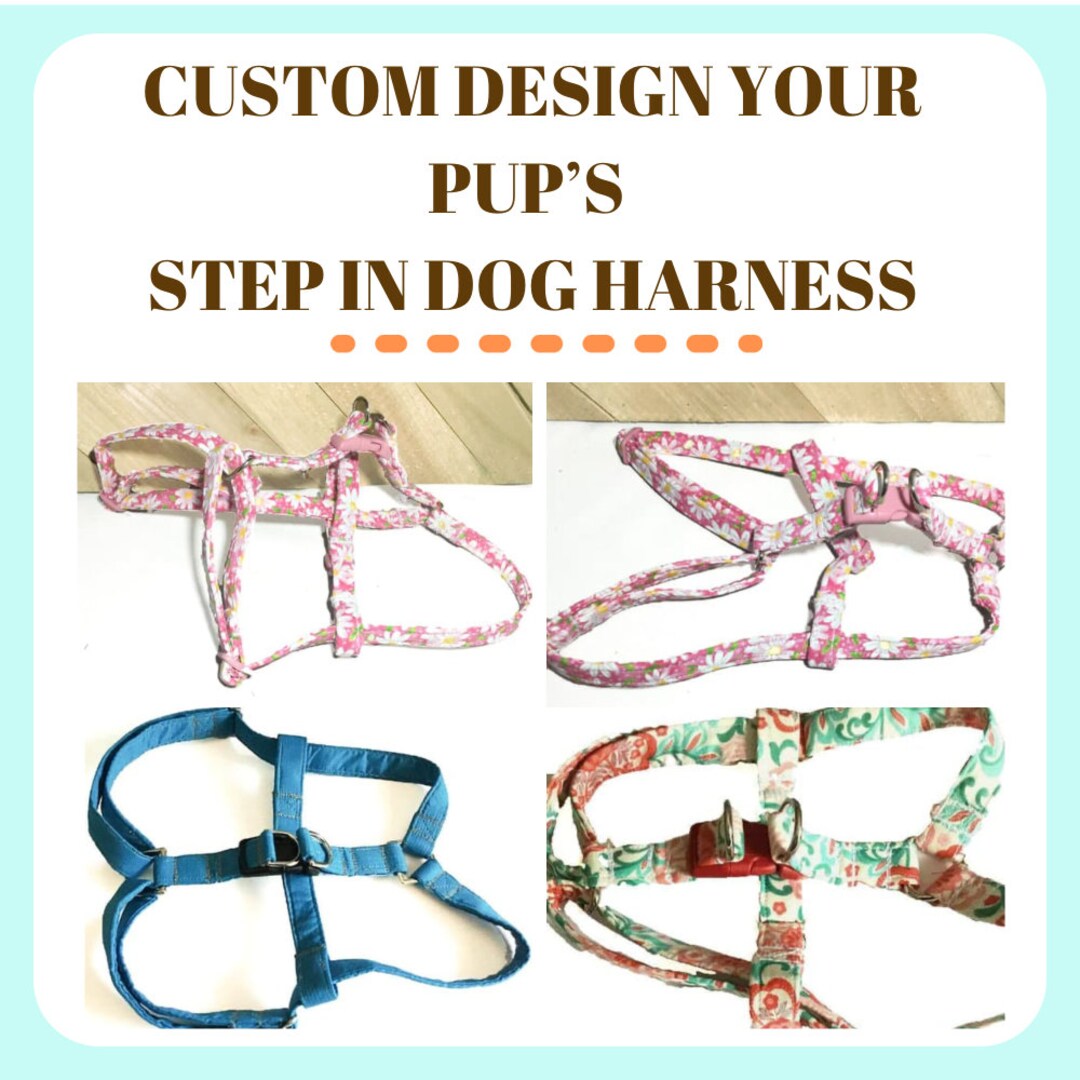
Personalizing Your Handmade Dog Harness
One of the most fun aspects of making your own dog harness is the opportunity to add personal touches that reflect both you and your puppy’s unique style. Here are a few ideas to make your harness truly one-of-a-kind:
1. Add Embellishments and Decorations
- Embroidery: You can embroider your puppy’s name or a cute pattern onto the harness to make it even more special.
- Patches: Sew on fun patches or decals that show off your puppy’s personality—maybe a little paw print or a star to make the harness even more playful.
- Fabric Patterns: If you’re using a solid fabric, consider adding a decorative fabric panel or contrasting stitching to add some flair.
2. Use Custom Colors and Fabrics
The beauty of creating a handmade dog harness is the ability to choose fabrics and colors that suit your puppy’s personality. You can use bright patterns for a playful look or go for more neutral tones if you prefer a minimalist style. Some fabric shops even offer waterproof or reflective fabrics, which could be a great option for evening walks.
- Tip: If you want your puppy to be visible during nighttime walks, opt for reflective fabric or bright, bold colors.
3. Consider Adding a Matching Leash or Collar
For a complete customized set, create a matching leash and collar to go along with the harness. This not only makes the outfit look coordinated but also ensures your puppy has a complete walking set that’s as functional as it is stylish.
Tips for Success When Making Your Dog Harness
Making a dog harness at home can be a straightforward project if you follow these helpful tips to ensure comfort, durability, and safety for your puppy.
1. Choose Comfortable Materials
Always prioritize comfort when selecting materials for your puppy’s harness. Look for soft fabrics that won’t cause any irritation, especially if your puppy has sensitive skin. Some excellent fabric choices include:
- Cotton for soft, breathable wear.
- Neoprene for added comfort and water resistance.
- Webbing for a more durable and sturdy design.
Pro Tip: If your puppy has a sensitive coat or skin, avoid materials that are too rough, like heavy-duty canvas, and go for a smoother option.
2. Focus on Functionality
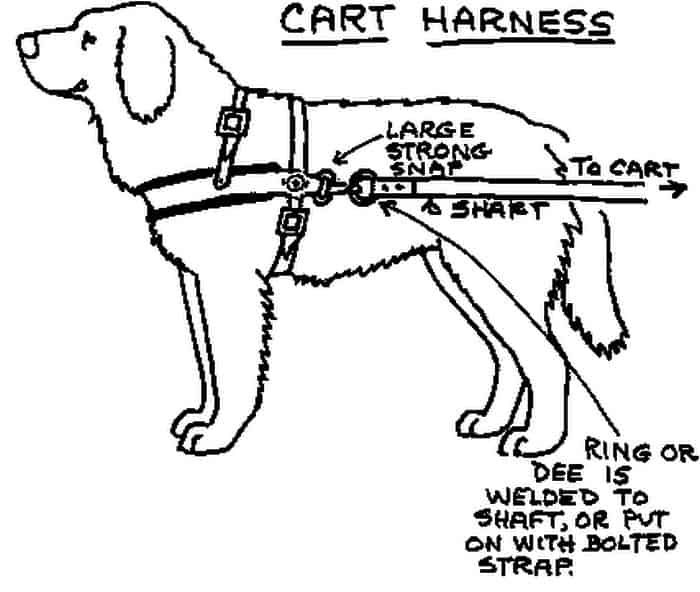
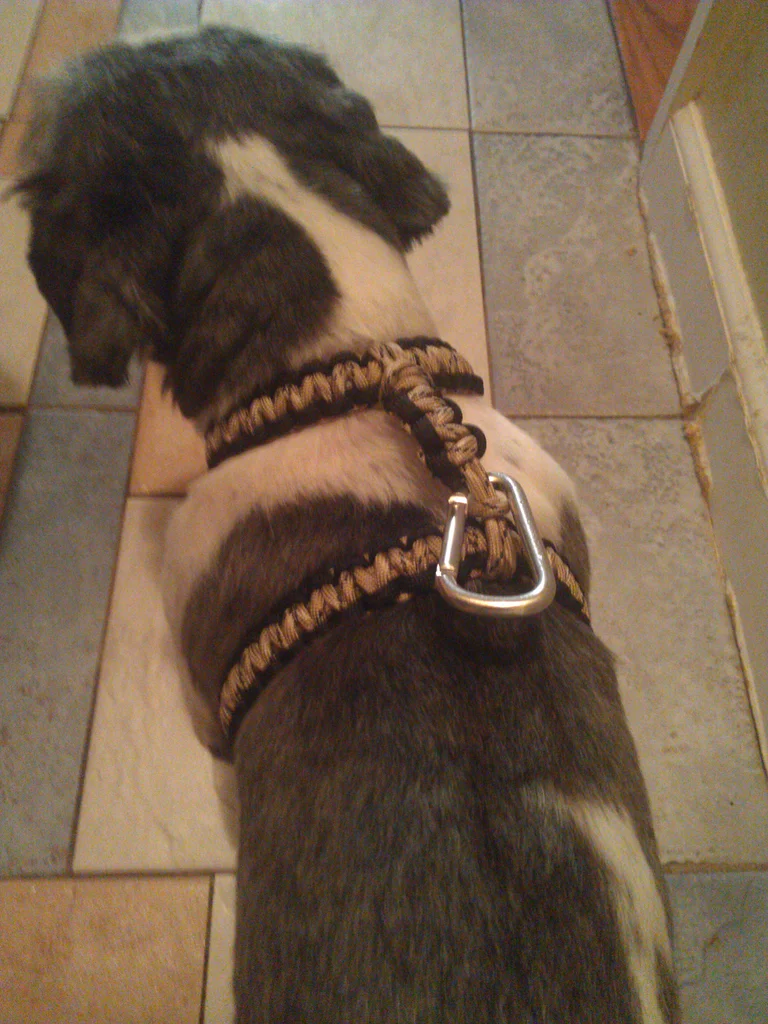
While style is important, functionality should always be your priority when crafting your harness. If your puppy tends to pull on walks, consider designing a no-pull harness that distributes pressure evenly across the chest. This design can help reduce strain on their neck and back while providing better control during walks.
- No-pull design tip: Ensure that the chest strap sits across the puppy’s sternum to distribute pressure more evenly.
3. Safety First: Double-Check the Fit
Before you get too excited about the final product, safety should always be your top concern. A harness that’s too tight could restrict your puppy’s movement, while one that’s too loose might cause them to slip out. Here’s how to ensure the perfect fit:
- Always leave room for two fingers between the harness and your puppy’s skin for comfort.
- Make sure the harness is not so tight that it causes chafing or restricts breathing.
- After adjusting the straps, do a test fit and watch your puppy move around to ensure the harness stays in place without rubbing or causing discomfort.

4. Reinforce the Stitches
Since your puppy may pull or tug at their harness, reinforcing the stitching around high-stress areas, like the neck and chest, is essential for durability. Go over these areas with a second pass of stitching, and make sure the fasteners are securely attached.
Frequently Asked Questions About Handmade Dog Harnesses
1. How do I know if my puppy’s harness fits properly?
To check the fit, ensure that the harness is snug but not tight. You should be able to fit two fingers comfortably between the harness and your puppy’s skin. If the harness is too loose, it might slip off; too tight, and it could cause discomfort or restrict movement.
2. Can I use a handmade dog harness for puppies that pull a lot?
Yes, you can design a no-pull harness that helps to distribute pressure evenly across your puppy’s chest. This type of harness can reduce pulling and make walks more manageable for both you and your puppy. Consider adding a front attachment point for the leash to further discourage pulling.
3. What type of fabric is best for a dog harness?
For comfort and durability, consider using fabrics such as cotton, neoprene, or polyester webbing. These materials are soft enough for comfort yet strong enough to handle your puppy’s movements. Avoid rough materials that could irritate your puppy’s skin.
4. Can I make a harness for an adult dog as well?
Absolutely! The process is the same for both puppies and adult dogs, though you’ll need to adjust the measurements to fit a larger chest and neck. Be sure to choose fabrics and fasteners that are appropriate for your dog’s size and strength.
Conclusion: Craft Your Perfect Handmade Dog Harness
Making a handmade dog harness for puppies can be an incredibly satisfying and enjoyable project that results in a personalized, custom fit harness for your furry friend. By choosing the right materials, following the step-by-step guide, and adding your personal touches, you’ll create a harness that’s not only practical but also stylish.
With these tips, you can ensure your puppy’s harness is both comfortable and secure. Whether you’re crafting for a playful puppy or an adult dog, a custom harness gives you full control over the fit and design, ensuring your pup is both happy and safe on walks.
Check out more DIY pet products and exclusive deals at MyTopDeals10.com!
Happy crafting, and enjoy those walks with your well-dressed puppy!
Let us know how your crafting experience goes, and feel free to share your personalized harness designs with us in the comments!
https://i.pinimg.com/736x/8f/92/8a/8f928ac70ce012100b233341e7a61232.jpg

