DIY Dog Harness Template for Sewing Beginners: Easy Step-by-Step Guide
Creating your own DIY dog harness is a fun and rewarding project, especially for those who are just starting out with sewing. Not only does it save you money, but it also allows you to create a customized accessory that fits your pet perfectly. Whether you’re a sewing novice or someone who just loves working on pet projects, this DIY dog harness template for sewing beginners is an ideal place to start. Follow along with our step-by-step guide, and you’ll be able to make a stylish and comfortable harness for your dog in no time!
Materials Needed for Your DIY Dog Harness
Before diving into the sewing, it’s important to gather all the materials you’ll need for this project. Having everything prepared in advance will make the process smoother and more enjoyable. Here’s a comprehensive list of materials:
- Fabric: You’ll need about 1/3 to 1/2 yard of cotton fabric (corduroy or cotton duck work best) and a bit of polar fleece for added comfort.
- D-rings: Two small D-rings (brass or stainless steel) are essential for attaching the harness straps.
- Velcro: A package of Velcro (hook and loop tape) will help you adjust the harness to fit your dog perfectly.
- Bias Binding: You can either buy pre-made bias binding or make your own for the finishing edges of the harness.
- Grosgrain Ribbon: ½ yard of 5/8″ grosgrain ribbon is needed for added style and durability.
- Thread: Choose matching thread for sewing.
- Measuring Tape: This will ensure you get the right measurements for your dog, making the harness comfortable and snug.
Once you’ve gathered your materials, you’re ready to begin! If you’re looking for a place to buy these materials, be sure to check out our handpicked selection of sewing supplies at MyTopDeals10.com for the best deals and exclusive discounts.
Step 1: Measuring Your Dog for the Harness
The first crucial step is measuring your dog correctly. Accurate measurements will ensure the harness fits snugly but comfortably. Here’s how to do it:
- Measure Just Behind the Front Paws: Use your measuring tape to measure around your dog’s chest, just behind the front legs.
- Divide the Measurement: Divide the measurement by two to get the length for the harness straps.
- Add Extra Room: Add about 2.5 inches to the total measurement. This extra room will help ensure that the harness can be adjusted to fit snugly.
Once you’ve measured your dog, you can move on to cutting the fabric. This step is crucial, so be sure to get the measurements right before proceeding.
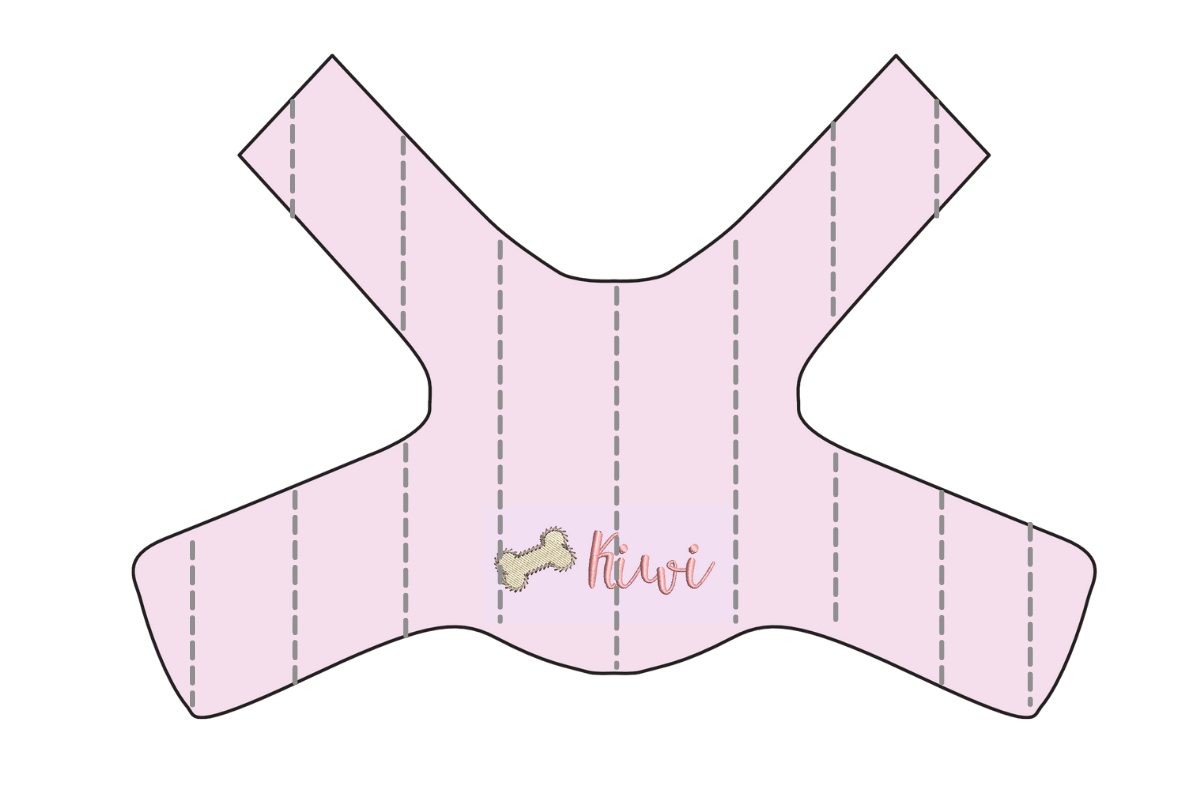
Step 2: Cutting the Fabric for the Harness
Now that you’ve measured your dog, it’s time to cut your fabric. This step requires precision, so take your time.
Cutting Instructions:
- Outer Layer: Cut two pieces of fabric for the outer layer of the harness. These should be cut on the fold to ensure a clean, symmetrical shape.
- Lining: Do the same for the lining fabric.
- D-ring Strap: If you’re making a strap for the D-rings, cut a small strip of fabric (about 2 inches wide). This strip will be folded in half and pressed to form the D-ring strap.
Take care to measure and cut the fabric accurately. You can always trim a little more later if necessary, but it’s difficult to add fabric once it’s been cut.
Pro Tip: If you want a more professional look, consider using a contrasting fabric for the lining. It can add a stylish touch to the final product.
Step 3: Preparing the D-ring Strap
The D-ring strap is one of the most important parts of the harness, as it will hold the leash and help secure the harness on your dog. Here’s how to prepare it:
- Fold and Press: Fold the fabric strip for the D-ring strap in half lengthwise, press it, and then fold both raw edges to the center.
- Press Again: After folding the raw edges inward, press again to create a neat, finished look.
- Sew: Once your D-ring strap is folded and pressed, sew along the edges to secure it in place.
You can find high-quality D-rings and other hardware at affordable prices by checking out our exclusive deals at MyTopDeals10.com.
Step 4: Sewing the Harness Together
This is where your sewing skills will really come into play. Don’t worry—if you’re new to sewing, this process is very beginner-friendly. Here’s how you do it:
- Align the Fabrics: Place the outer fabric right side up and the lining right side down on top. Align the edges so they fit together perfectly.
- Pin the Fabrics: Pin the fabric pieces together to ensure they stay in place while you sew.
- Sew the Perimeter: Sew around the perimeter of the fabric, leaving a small opening (about 2–3 inches) so you can turn the fabric right side out.
- Turn It Right Side Out: After sewing, turn the fabric right side out through the small opening. You should now see the clean, finished sides of the fabric.
- Press: Use your iron to press the fabric flat, ensuring a professional, crisp finish.
Once you’re happy with the shape of the harness, it’s time to close the opening. Simply sew the opening shut using a hand stitch or your machine for a clean finish.
Step 5: Attaching the D-rings and Velcro
Now, it’s time to attach the D-rings and Velcro, which will make the harness fully functional and adjustable.
Attaching the D-rings:
- Insert the D-ring into its designated spot on the harness.
- Secure it with Sewing: Sew around the D-ring to ensure it stays in place and can handle the pull of the leash.
Adding Velcro:
- Position the Velcro: Attach one piece of Velcro to the end of the harness and another to the corresponding spot to create a secure closure.
- Sew the Velcro: Make sure the Velcro is sewn on securely to ensure the harness stays snug and doesn’t slip during walks.
Step 6: Adding Final Touches
Once your harness is fully assembled, it’s time for the final touches. This is where you can get creative and personalize your dog’s harness:
- Decorative Touches: Consider adding a bow tie, embroidered patches, or even ribbons for a cute, personalized look.
- Bias Binding: Use bias binding or grosgrain ribbon to finish the edges of the harness. This will not only make the harness look more polished but will also help prevent fraying over time.

Adding these details is optional but can really elevate the look of the finished product, especially if you want your dog to stand out in style.
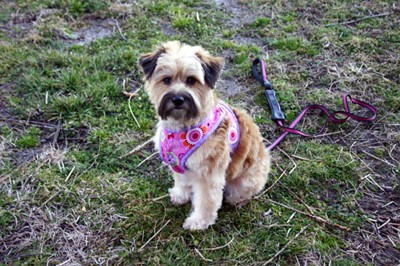
Conclusion: Fit and Adjust the Harness
Once the final touches are complete, it’s time to fit the harness on your dog. Here’s how to ensure it fits comfortably and securely:
- Slip the Harness Over Your Dog’s Head: Gently slip your dog’s front paws through the harness loops.
- Adjust the Fit: Use the Velcro straps to adjust the harness for a snug, comfortable fit. The harness should be tight enough to stay in place, but loose enough to allow your dog to move freely.
By following these steps, you’ll have a stylish and functional DIY dog harness that’s custom-made to fit your furry friend perfectly!
For more detailed pet accessory guides, check out our comprehensive dog products review on MyTopDeals10.com. Plus, don’t forget to use our exclusive discount code “MYDOGDEAL10” for 10% off your next purchase of dog supplies!
Ready to make your own harness? Start sewing today, and give your pet a gift that’s both practical and made with love.
DIY Dog Harness Template for Sewing Beginners: Final Steps to Complete Your Project
Congratulations on making it this far with your DIY dog harness! You’re almost finished, and your pet is about to enjoy a stylish, custom-made accessory that fits perfectly. As you finalize your project, let’s walk through the last steps, tips, and some common questions that might arise during your sewing journey.
Step 7: Fitting and Adjusting the Harness
Once you’ve attached the D-rings and Velcro, it’s time to try the harness on your dog. Proper fitting is crucial for both comfort and security. Here’s a step-by-step guide to ensure your dog’s harness fits perfectly:
Fitting the Harness:
- Slip the Harness Over the Head: Carefully slip your dog’s front paws through the harness loops. Make sure the harness sits comfortably behind the front legs and across the chest.
- Adjust the Velcro: Adjust the Velcro straps to ensure a snug fit. The harness should fit tightly enough to stay in place but still allow your dog to move freely and comfortably.
- Check for Comfort: After securing the Velcro, run your fingers underneath the straps. There should be enough space to slide one or two fingers comfortably underneath the harness for breathing room, but not so much that it moves around.
Pro Tip: Always check the harness fit by gently pulling on the leash or walking your dog around for a few minutes to see how it moves. The harness should stay in place without chafing or restricting movement.
Once you’re satisfied with the fit, your dog is ready for a walk! If you need to make any adjustments, don’t hesitate to undo the Velcro and tweak the fit until it’s just right.
Step 8: Additional Tips and Tricks for Success
To ensure your DIY dog harness is not only functional but also long-lasting, here are a few additional tips and tricks:
- Use Durable Fabrics: While cotton is a great fabric for comfort, consider using cotton duck or corduroy for the outer layer. These fabrics are thicker and more durable, perfect for handling wear and tear.
- Reinforce Stress Points: Dogs tend to pull, so it’s important to reinforce the areas where the straps connect to the D-rings and Velcro. Use extra stitching or consider adding reinforcement patches for durability.
- Avoid Scratchy Edges: Use bias binding or grosgrain ribbon to cover raw edges. This not only makes the harness look more polished but also prevents any uncomfortable rubbing against your dog’s skin.
- Personalize It: Add embroidery or sew on a patch to make the harness uniquely yours. Your dog will look even more adorable with their own personalized gear!

FAQs: Common Questions About DIY Dog Harnesses
1. Can I make a harness for a large dog?
Yes, you can! The beauty of a DIY dog harness template is that you can adjust the size to fit any breed. For large dogs, be sure to use a thicker fabric like cotton duck for strength and adjust the straps accordingly to ensure a secure fit.
2. What type of fabric is best for a dog harness?
Cotton fabrics are soft and breathable, but for a more durable and heavy-duty harness, cotton duck or canvas works better. These fabrics are strong and can handle the stress of an active dog pulling on the leash.
3. How do I make sure the harness is comfortable for my dog?
Comfort is key! When making your harness, be sure to:
- Use soft polar fleece for the inner lining.
- Avoid sharp or scratchy edges by using bias binding or grosgrain ribbon to cover raw edges.
- Ensure there is enough room for adjustment with Velcro to customize the fit.
4. Can I add reflective elements for safety?
Yes! If you’re planning on walking your dog at night, adding reflective tape or a reflective patch to the harness is a great idea. It will make your dog more visible in low-light conditions, ensuring their safety.
5. How can I make my DIY harness even more stylish?
For a stylish touch, consider adding decorative ribbons, embroidery, or even personalized patches. You can also experiment with different fabric patterns for a unique look.
Step 9: Celebrating Your DIY Dog Harness Success
Congratulations again! By following this step-by-step DIY dog harness template for sewing beginners, you’ve created a functional, stylish, and comfortable harness for your furry friend. Not only does this project save you money, but it also provides a sense of accomplishment as you’ve crafted something special with your own hands.
Now that you’ve mastered the basics, you can experiment with different designs, fabrics, and embellishments. The possibilities are endless! For more DIY projects and pet accessories, don’t forget to visit our MyTopDeals10.com pet supplies section for expert reviews, product recommendations, and exclusive discount codes.
Conclusion: Your Pet Deserves the Best
Making a DIY dog harness for your pet not only provides a customized fit but also offers a fun and creative outlet for you as a beginner sewer. Plus, it’s incredibly rewarding to see your dog comfortably wearing a harness that you made yourself!
If you’re looking for high-quality materials to start your next project, check out our curated list of top-rated sewing supplies at MyTopDeals10.com. We offer detailed reviews, product links, and special deals to help you save on your next DIY project.
Ready to sew your dog’s new favorite accessory? Get started today, and don’t forget to use our discount code “MYDOGDEAL10” for 10% off your purchase of pet supplies! Happy sewing!
By following these steps and tips, your dog will be rocking a beautiful, custom-made harness in no time. Start crafting, and enjoy the process of making something truly special for your furry friend!
https://oliviajanehandcrafted.com/diy-dog-harness/free-7/